How to crop in Figma
In this post I am going to walk you through how to crop an image in Figma.
What is Figma
Figma is a popular tool for designers, product managers, writers and developers and helps anyone involved in the design process contribute, give feedback, and make better decisions, faster.
Download Figma
To add a custom font to Figma you first need to download the Desktop app from here. Depending on what kind of platform you use, you can choose between the Desktop App for macOS or Windows.
Crop an image
Select the image you wish to crop and double click on it. It will open up the image menu popup.
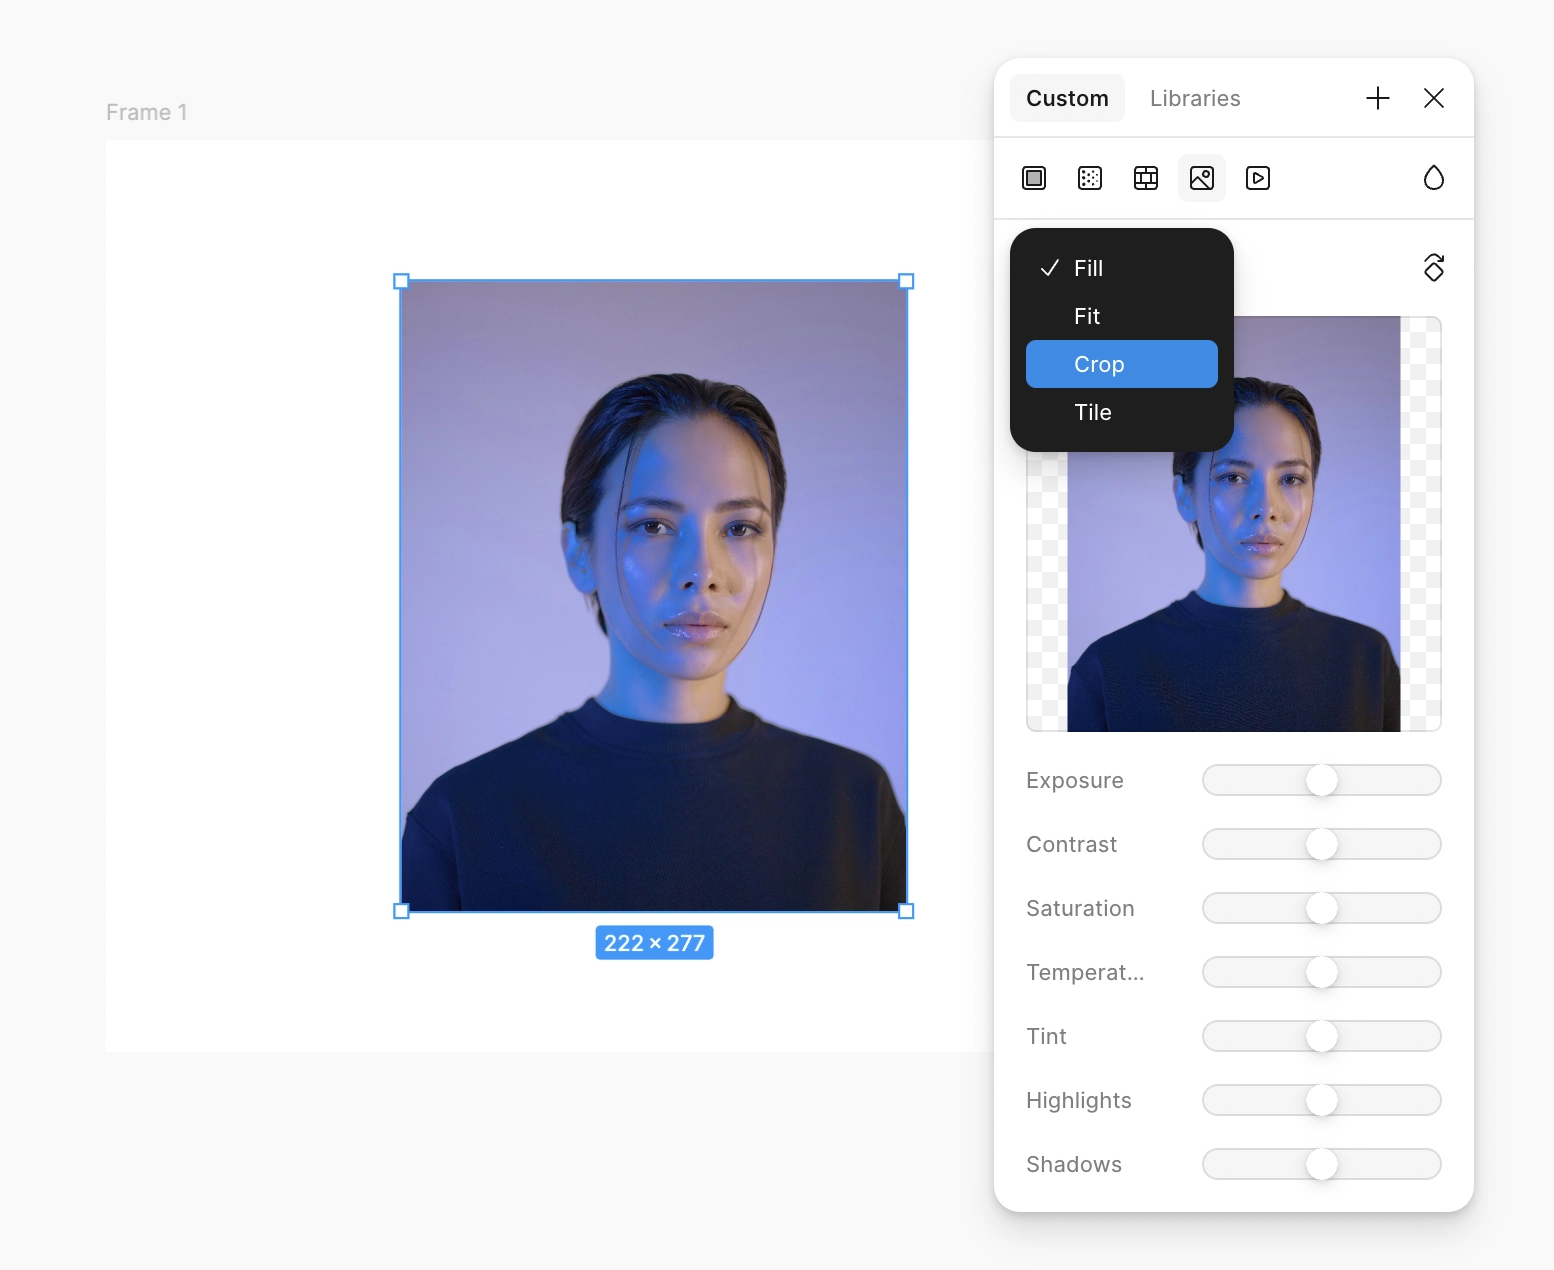
In the image pop up menu, click on the drop down menu which is set to Fill by default and select Crop.
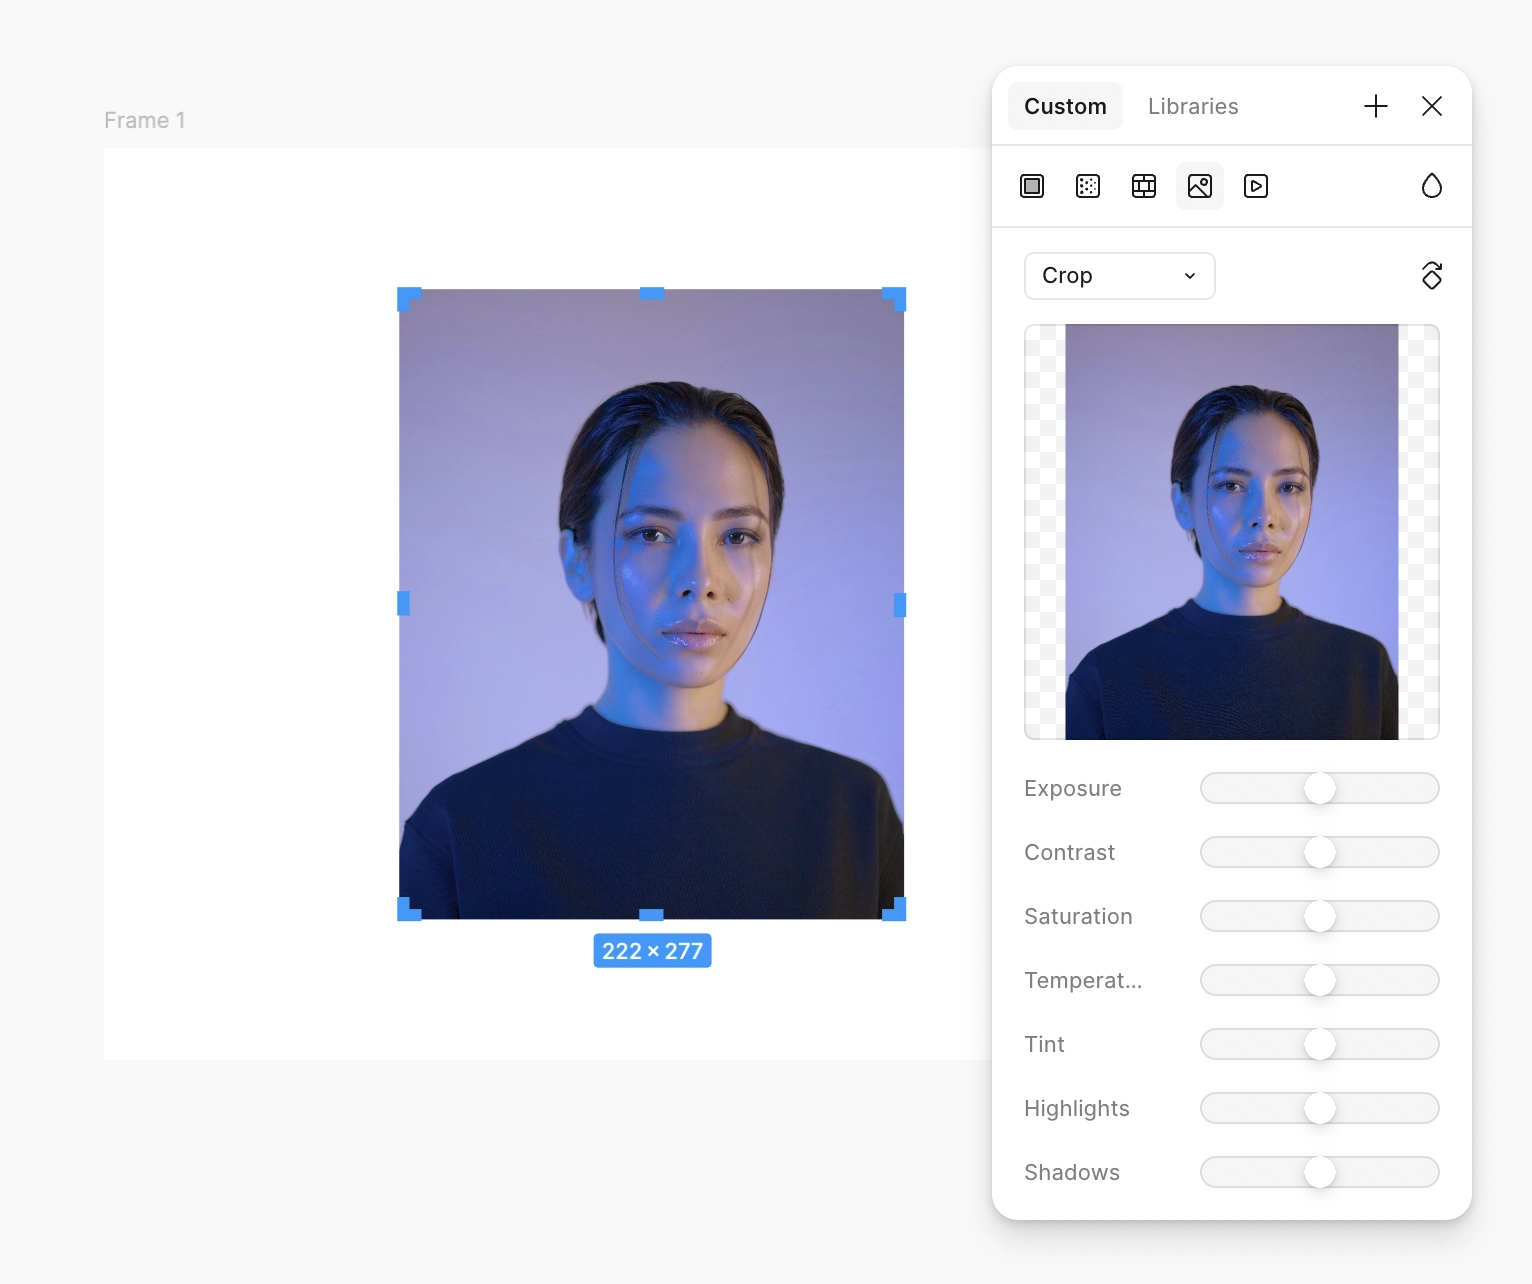
Set the desired crop area using the handles provided by Figma on all the corners and midpoints of each side. Figma will also provide you a preview of your final crop.
Once the desired crop area is set, press Enter to crop the image.