How to superscript in Figma
In this post I am going to walk you through how to superscript in Figma.
What is Figma
Figma is a popular tool for designers, product managers, writers and developers and helps anyone involved in the design process contribute, give feedback, and make better decisions, faster.
Download Figma
To add a custom font to Figma you first need to download the Desktop app from here. Depending on what kind of platform you use, you can choose between the Desktop App for macOS or Windows.
Superscript in Figma
Superscripting text in Figma is a simple but powerful way to make your designs look polished and professional. Whether you're working with formulas, footnotes, or any text that needs that extra little lift, Figma makes it easy to add a superscript effect.
To get started, first select the text you want to superscript. Once your text is highlighted, navigate to the Typography section in the right sidebar and click on the settings icon to open more detailed options.
Next, click on Details and scroll down until you find the Numbers section. Here, Figma provides several options for styling your numbers and text.
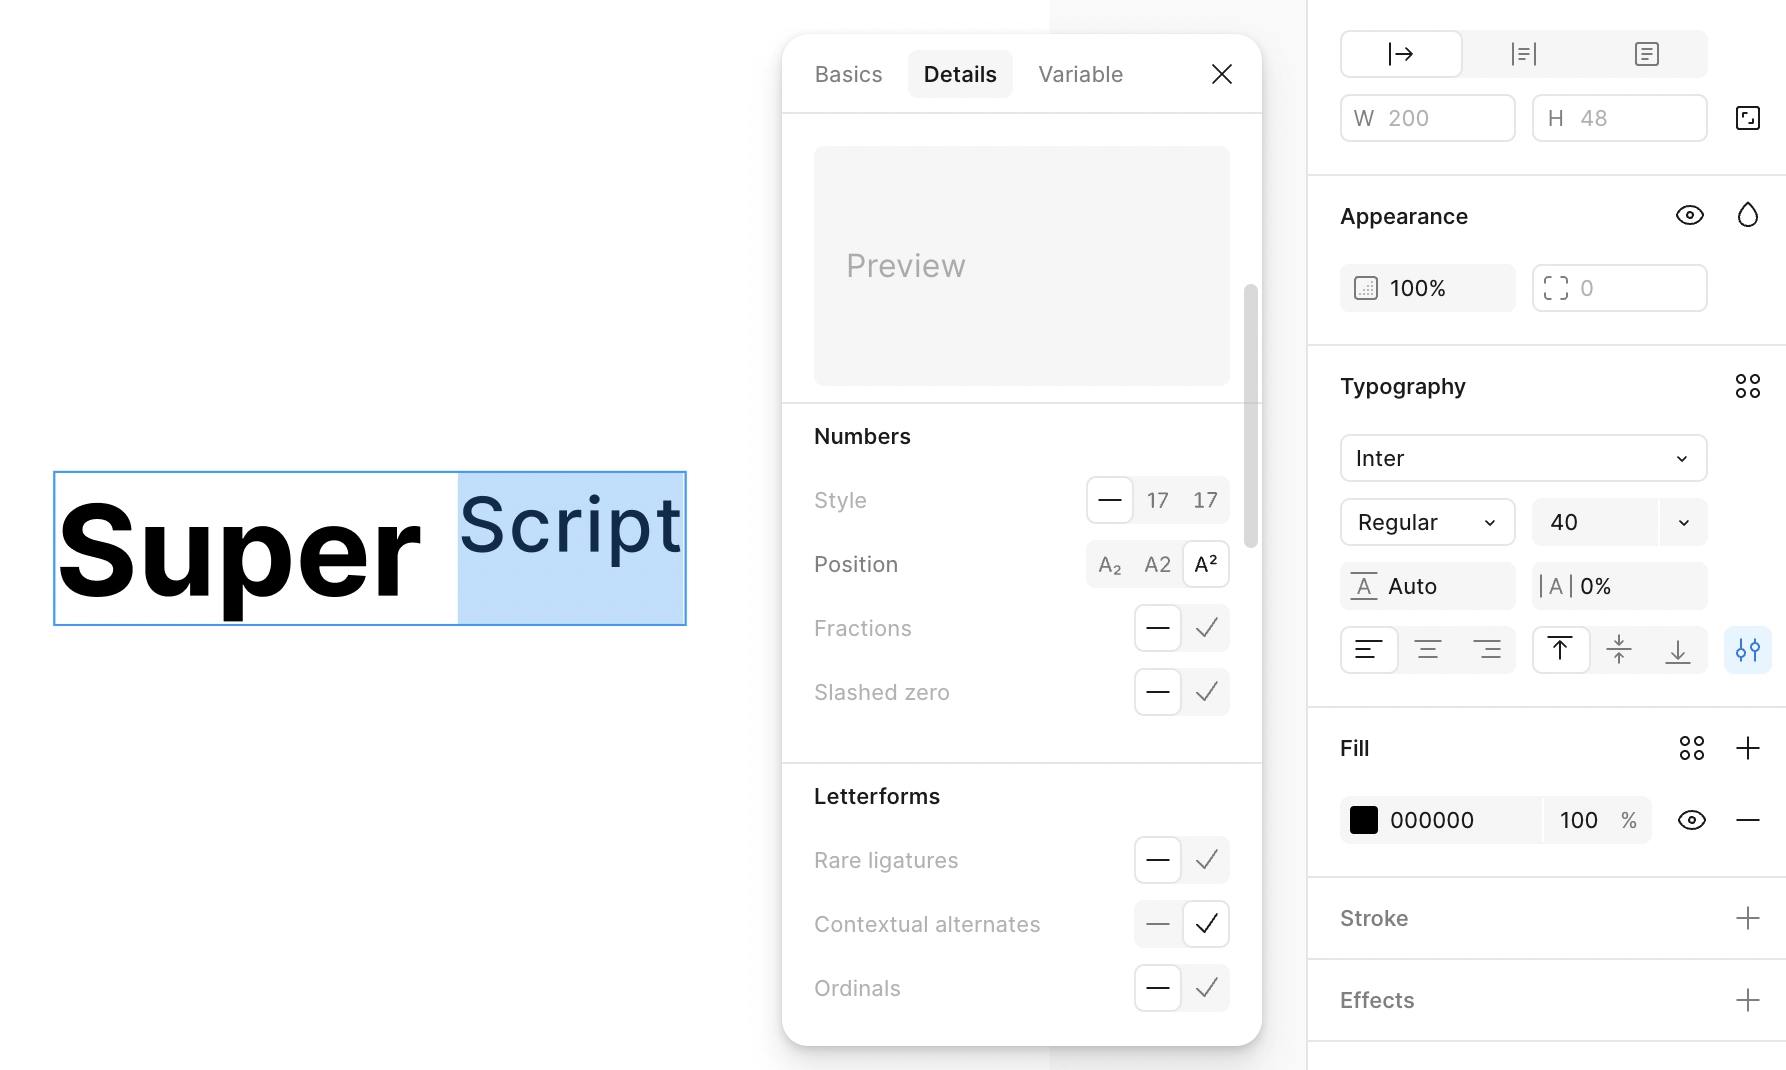
Finally, choose A2 to apply the superscript effect to your selected text. Instantly, your text will appear smaller and raised, giving it that clean, professional superscript look. Using superscripts in Figma is perfect for creating technical documents, stylish presentations, or any design that requires precise formatting.
With just a few clicks, you can elevate your typography and make your Figma designs look even more refined and visually appealing.